


Don’t Ignore This Tiny Part! It Decides If Your Parking Heater Works in Winter ❄️
When the cold winter hits, for long-haul truckers, RV campers, or anyone who parks their car outdoors in cold areas, a parking heater is a total lifesaver — you don’t even need to start the engine to keep the cabin toasty and the fuel line from freezing. But here’s the thing most people don’t know: whether this “winter warmer hero” works properly all depends on a tiny, easy-to-overlook part — the parking heater ignition needle.
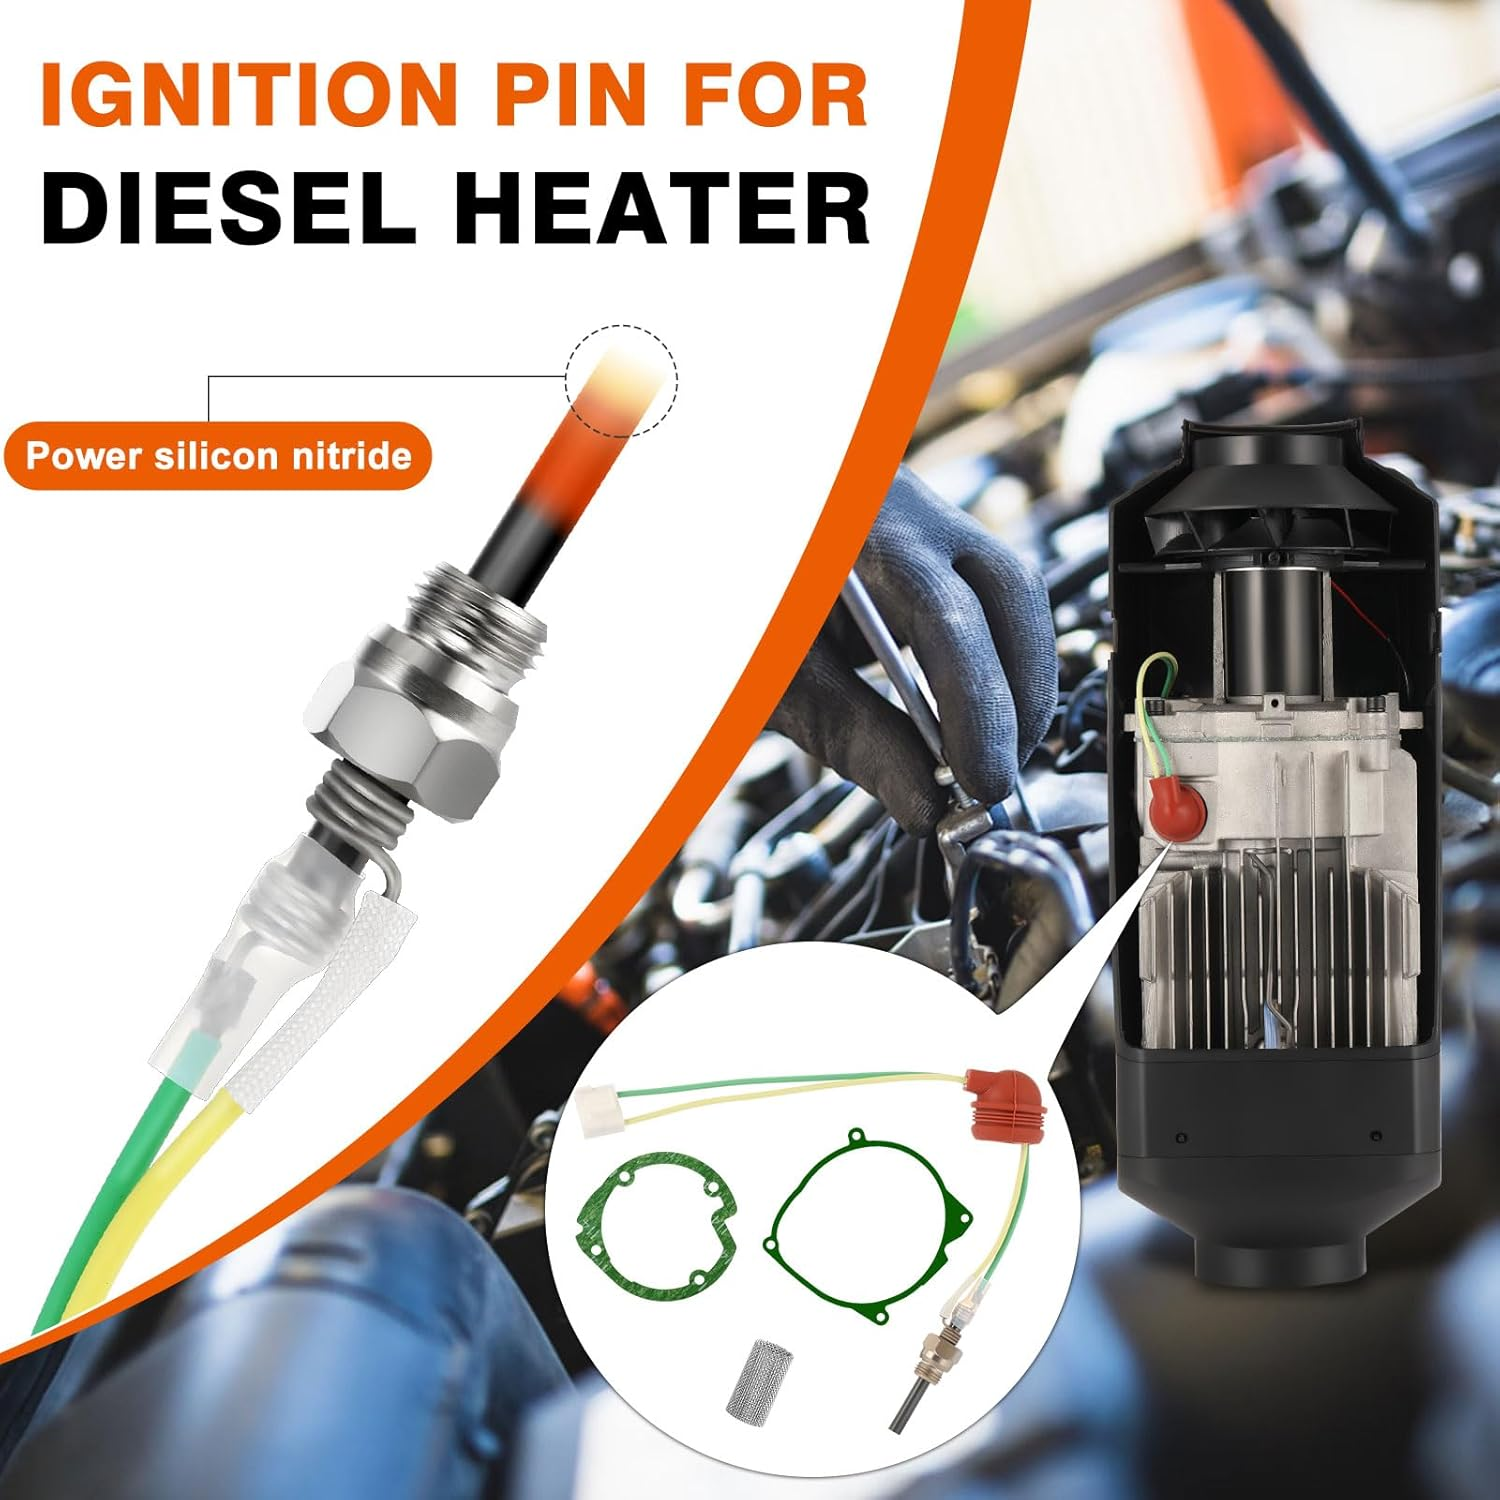
It’s small, looks like a thin metal pin, and hides inside the heater’s combustion chamber, but it’s basically the “ignition key” for the entire heating system. So many drivers have trouble with their parking heaters: they won’t start, shut off constantly, or even throw error codes. You check everything, only to find out the problem is just this little needle. Today, let’s break down everything you need to know about parking heater ignition needles, so you can avoid winter driving headaches.
First off, the main question: what even does an ignition needle do? Honestly, its working principle is super simple — just like the lighter you use every day. Its core job is to create a high-temperature electric spark that ignites the mixture of atomized fuel and air, which fires up the heater’s combustion process and produces heat for your cabin.
Unlike traditional ceramic glow plugs that take 60 seconds to warm up to ignition temperature, the mainstream ion ignition needles we use now can create local high temperatures in just 3-6 seconds through targeted local discharge. Even in extreme cold — as low as -30°C (-22°F) — they can ignite instantly. They’re energy-efficient and reliable, with a working power of only 57W, which saves a ton of battery power. Plus, their design is smarter: most needle tips are bent to accurately align with the vaporizer screen at the fuel supply, so the ignition success rate is almost 100%.
Even though it’s such a crucial part, it’s often forgotten until something goes wrong. The good news? Ignition needle failures come with clear warning signs. Learn to spot them, and you’ll save yourself unnecessary trips to the repair shop and extra money.
The most common issue is failure to ignite. You start the heater, hear the fan running, but get no hot air — sometimes even error codes like E01 or E05 pop up. Chances are, it’s the ignition needle. Either the needle tip is covered in too much carbon buildup, blocking the spark gap so it can’t make a strong enough spark; or the ignition needle is worn out, burned, or even broken (so it can’t ignite at all); it could also be a loose wire connection, which doesn’t supply enough power for the needle to work.
On top of that, if your heater shuts off frequently — it ignites, then dies after a few seconds — that could also be the ignition needle’s fault. If the needle’s performance drops and it can’t keep the spark going, the flame will go out instantly, and the heater will shut off as a safety measure. Another sign: your heater starts smoking black smoke or uses way more fuel than usual. If you check the fuel line and it’s fine, take a look at the ignition needle — it’s probably because the ignition isn’t sufficient, so the fuel isn’t burning all the way.
A lot of drivers’ first instinct when they have these problems is to call a mechanic, but the truth is, most small ignition needle issues can be fixed by yourself. And with regular maintenance, you can drastically extend its lifespan.
Daily maintenance boils down to two key things: cleaning and checking. We recommend cleaning the ignition needle every 1-2 months, especially after heavy use — the needle tip gets covered in carbon and oil easily. You don’t even need to take the heater apart: just open the heater’s air intake cover, disconnect the ignition needle’s power plug, gently sand the needle tip with fine sandpaper to remove carbon buildup, wipe it clean with a dry cloth, and reinstall it. The whole process takes less than 10 minutes.
When checking, focus on three things: first, check if the needle tip is worn, burned, or broken. If it’s severely deformed or broken, replace it right away. Second, check if the wires are loose, worn, or if the plug is rusted — tighten or replace the wires if you spot any issues. Third, check the ignition needle’s resistance: normally, it should be between 5-10Ω. If it’s outside that range, the needle is damaged and needs to be replaced.
If you do need to replace the ignition needle, it’s super easy — and cheap! Most regular ignition needles on the market cost between $1.50 and $6, and they come in two sizes: 12V and 24V, to fit different parking heaters. Just pick the one that matches your vehicle. Use a special wrench to unscrew the old needle, screw in the new one (don’t over-tighten it), and plug the power back in. Even if you’re new to car maintenance, you can do this in minutes.
One last tip: when choosing an ignition needle, go for high-quality materials if you can. For example, rust-proof ignition needles treated with special coatings are corrosion-resistant, conduct electricity better, and can last up to 5,000 hours — that’s 3 times longer than regular ones. They’re especially great for people in extremely cold northern areas, as they prevent ignition failures in low temperatures.
Winter driving is all about the little details. The parking heater ignition needle may be small, but its condition directly determines whether you can warm up your car quickly and drive safely in the cold. Instead of panicking when it breaks down, spend a few minutes on regular maintenance — it’ll save you the trouble of getting stranded and the cost of expensive repairs.